Showing posts with label Baby. Show all posts

Wednesday, 8 October 2014

Pink Robot Geeky and Vintage Skirts!

I have decided to develop and refine Pink Robot as a brand, by launching my first proper product. I have always been a "butterfly crafter"- I blame Pinterest and wonderful publications like Mollie Makes!- so my plan is to start with one product and expand. 

One project I've really enjoyed is making cute little unusual skirts for my girls. I have never really chosen to dress them in traditional "baby pink" clothes, so I love the reaction they get from people. The skirts are nothing like the ones available on the High Street. It's great to know that nobody else will have the same one, making it special and unique. 

I have 2 ranges- one range crafted from modern fabrics (which are unusual and largely geeky!) and another range made from reclaimed vintage and retro fabrics. 
Records, from the original range
Here is a selection from the vintage & retro range
Amazing Return of the Jedi vintage Star Wars fabric
Roland Rat- a blast from the past! 
Who doesn't love Postman Pat?!
Beautiful, bright Care Bears fabric for all you 80s children!
Hollie Hobbie- cosy for winter
People have been asking if I will branch out to making other items along the same geeky/ vintage theme. The answer is yes- eventually. I want to establish Pink Robot through making customers happy with my skirts first, then I'll move on to include other products in my range.

Click here to visit Pink Robot on Facebook! 

There is a giveaway on the page at the moment, to win a skirt PLUS one for a friend. Enter now! Competition closes on Sunday 12th October. 

Tuesday, 12 August 2014

Double buggy revamp

After Betsy's arrival, I decided fairly quickly that I definitely needed a double buggy. While I loved the idea of carrying my new bundle in a wrap while pushing my toddler in her single buggy, it become apparent that this solution would not be hugely successful on longer trips. Carrying my warm and toasty newborn in the beautiful weather we have enjoyed recently became a little uncomfortable after about an hour or so!

I did my research; I drive a tiny Yaris, so I needed something compact to fit in my boot. I looked at online forums and spoke to friends and family and even visited shops, to find the perfect model. Eventually, I decided that the Phil&Ted's Sport buggy was perfect... aside from the price tag of £500+! Luckily for me, a double buggy isn't something people tend to keep once they have outgrown the need for it, so they are widely available on the second-hand market. 

I found one on eBay for £100- a fraction of the price of buying new. At that price, however, there were a few cosmetic issues. The black and grey colour combination was also not one I'd have chosen- while functional and unisex, I prefer cheerful colours! 
"Before" picture- the drab buggy!
A little bit grubby!
The main issue was the lack of foam on the handle. Not only did it look awful (and make the whole buggy look as though it was ancient) but it would also be uncomfortable to push. I took to eBay, and found a seller who stocked replacement foam for less than a tenner- which was delivered the next day! Simply replacing the foam instantly made the buggy seem newer. 
Missing handle foam, revealing ugly scrapes
Betsy all cosy underneath the main seat,
and the new handle
There's a lot to be said for good old-fashioned elbow grease to make pre-loved items seem new. After a vacuum, a scrub and a spritz of Febreeze, it came up spotless.
Taking time to clean the wheels made a big difference!
Now for the colour injection! New seat pads and strap pads are a great way to update a second-hand buggy, making it look new and unique. These are available inexpensively  from loads of sellers online. I opted for a bright colour combination I love- lime green and pink. It's certainly unique, and I'm really pleased with my budget double buggy.

It also occurred to me that doing these simple things before selling your old buggy would add value to it! 
Cherry blossom pink and green
Heather insisting on pushing her little sister! 

Wednesday, 30 July 2014

My latest creation... baby Betsy!

After a bit of a break in writing, I'd like to introduce my latest creation, baby Betsy Mae. She was born 3 weeks ago, and I'm in love! As you can see from the photographs, Heather is enjoying being a big sister too.

Life so far juggling 2 children under the age of 2 has been busy to say the least, but I have loved it. I'm now really looking forward to settling in to maternity leave and getting back into being creative, writing my blog and finding ways to save money. Watch this space! 

Heather learning her "big sister" duties
My two girls just chilling in bed

Friday, 25 April 2014

Lara Jill Changing Bag Review

Vlinder Baby Bag
Vlinder oilcloth baby bag, £39.99
When my old-faithful, free Boots Parenting Club changing bag finally gave up and burst earlier this month, I was forced once and for all to find a replacement. I'd been talking about it for months- the bag was really too small, everyone I knew had the same one (resulting in numerous bag mix-ups) and there had been holes in the lining for ages. It had served me well (especially for free!) but with two babies in nappies on the horizon... on to bigger and better things!

Browsing in high street shops, I was horrified at the price of changing bags. Unless I wanted a very basic, small, plain-coloured model, I would have to shell out a small fortune. Quality and function at the right price are absolutely essential- this bag will be used to hold everything I need for two babies after all! 

I turned to independent designers, makers and retailers. Lara Jill bags stood out for me from the rest of the market, mainly because of the gorgeous fabrics and patterns. They are all made from oilcloth, which also attracted me to them- I take my changing bag outside a lot, and a waterproof element is certainly helpful in the Scottish rain! Lara sent me a stunning Vlinder changing bag from her range to put through its paces and review
Love the colours and pattern of the fabric
Loads of pockets and compartments!
The bag was delivered quickly and well-packaged by courier. It was bigger than I expected, measuring 43 L x 14 W x 28 H (cm). The larger size is actually perfect for me, considering I will be using it for more than one baby. I also tend to spend a lot of time out and about and on the move, hence more supplies! There are also smaller bags from the same range available too, in a very similar style. 

It has the option of using a shoulder strap or handles. The handles make it feel like a fashionable adult bag, while the shoulder strap is practically useful. I found that the design of the handles made them soft to carry. The strap is adjustable, so it is easy to hang over the handles of a pram or buggy. Sometimes I go without a pram, instead choosing to wear Heather in a sling- so the fact that the shoulder strap can be made as long as I like is really useful for babywearing. 


There are loads of pockets and sections in this bag, which is a huge bonus for me. There are zip pockets on both the front and back- easily accessible and perfect for my own essentials like my phone, keys and purse. There are also separate pockets on the inside, so no rummaging for dummies, snacks and smaller items! The main compartment is very spacious. Heather and I went out for the whole day, taking all the supplies necessary- and as you can see, there was plenty of room left to comfortably fit her dolly! The 2 elasticated bottle compartments on the sides are a great feature- they accommodate both my water bottle and her milk bottle. 
Easy to hang over the pram...
... or a buggy!
The Vlinder Baby Bag comes with a matching changing mat. It is thin, so doesn't take up much room, yet slightly padded for comfort. The oilcloth fabric really lends itself to this purpose, as it's easy to wipe down. 

This bag is truly multi-functional. We used it as a flight/ travel bag on holiday, and there was more than ample room to carry everything we needed. The shoulder strap came in really handy when our hands were full from carrying suitcases and everything else that comes with travelling with baby!
On a bus in Tunisia
I would highly recommend purchasing a changing bag from Lara Jill- I have thoroughly road-tested mine (both at home, travelling and during a holiday!) and it has ticked all the boxes for me. This bag is clearly made to last, so I look forward to using it for a long time to come. 

Beautiful, budget nursery!

Heather's room
Heather's budget nursery
I am delighted that my first post for Kiddicare's new-look website: Bump, Baby & You has now gone live! I wrote about my experience in creating a gorgeous nursery on a budget, as I know how costs can really add up at this time. 

I passionately believe that the most beautiful baby nurseries are designed with love, and filled with items that mean something. The great news is, they don't need to break the bank! Read my post here at Bump, Baby & You: 

http://blog.kiddicare.com/2014/04/beautiful-budget-nursery/

Saturday, 12 April 2014

Holiday Bargains... Sun, Here We Come!

We are off on holiday today for a week in the sun, away from the constant grey drizzle that has been around since last summer! I wanted to share some holiday bargains I've found, and some ways I've kept the costing of packing down. I wrote a post a while ago about how to book a holiday on a budget (Going On Holiday Abroad... the Thrifty Way!) so consider this part 2. 

Buggy: One item I knew I would have to buy was a lightweight, folding buggy. Our pram is just too heavy and bulky for a flight, and Heather is getting to the age and stage where a buggy is more suitable for her anyway. After shopping around, I chose this buggy from Kiddicare's spring sale- reduced from £59.99 to a very affordable £27.99 (including free delivery!) Borrowing a buggy is of course an even thriftier option- however, since we will continue to use it after the holiday it made sense to buy one of our own. 
Kiddicare buggy, less than half price at £27.99!
Baby clothes: Toddlers need a lot of clothes on holiday, even just for a week. Suncream, eating in restaurants, swimming, sand and ice cream mean frequent changes of clothes. Kitting them out needn't break the bank though! Think about buying second-hand- lots of used holiday clothes are in perfect condition, as they have generally only been worn for a week-long holiday! We bought lots of things for Heather is as-new condition, for next to nothing on eBay and in local thrift shops. I've packed lots of handmade baby skirts, so saved money that way too. We cheerfully accepted hand-me-downs from my sister-in-law, and here are a few highlights from Heather's new(ish!) summer wardrobe: 

Gold Baby Gap sparkly cardi, £2 from Merry Go Round
Beautiful summer set, second-hand from my sister-in-law
Handmade skirts, around £2.50 each to make
T-shirt selection, most around 99p from eBay!
Toys: Small children have absolutely no concept of how much things cost, or where they came from- if something is fun, it's fun. I opted for lots of small items instead of fewer, larger things, and sourced them as cheaply as I could. This inflatable ball was one of my favourite finds, and at only £1.49 from eBay, including delivery, it's a total bargain. I'll blow it up when we get there, so at present, it takes up next to no room in my suitcase.  
£1.49, from eBay!
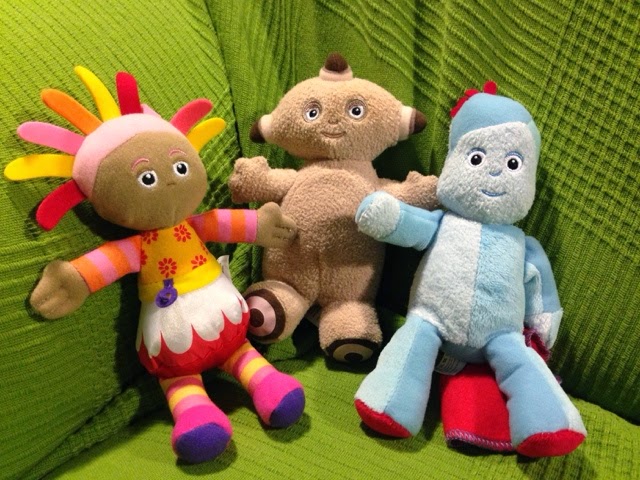
While shopping for swimming nappies in Asda, I found these cute mini In The Night Garden cuddly toys, reduced to £4.77 each. Just the right size to pop in our flight bag, I'm excited to see Heather's reaction when she sees them- and I'm hoping they'll make up for the fact I've woken her up at 3:30am to catch a flight! 
Upsy Daisy and friends, reduced in Asda!
Sun Cream: I haven't been on holiday for a few years now, what with buying a house and having a baby- but was sun cream always so expensive?! Even taking into account the "buy one, get one free" offers in nearly every store, it was coming in at around £6 for a 200ml bottle. This adds up, considering that we need both factor 50 for Heather and factor 30 for us, and enough to last a week! Aldi came to the rescue with its Lacura brand, at £2.79 a bottle. It actually smells really nice and rubs in just as well as its expensive counterparts.  

Trunki: Buying a Trunki in itself is not very "thrifty", as it's not an absolute holiday essential. However, we were given a gift of money from a relative to buy Heather "something for her holidays" and I wanted to choose something that would last her past this one week. This fun ladybird Trunki has been a brilliant choice already- she loves climbing on it and pulling it along, and once she discovers that it's full of toys and books, she'll love it even more. Since she will be able to use it for several years to come, it's worth the money. I shopped around for the best prices online, and bought this one for £34.99 in Kiddicare's spring sale- including delivery. 
Harley the Trunki, £34.99 from Kiddicare
I'd love to hear your thrifty tips for going on holiday... go ahead and add them in the comments! 

Wednesday, 2 April 2014

Cheeky Wipes Review: Eco-Friendly, Thrifty Baby Wipes!

Having a messy one-year-old means that I go through an awful lot of baby wipes. I was using over a packet a week, and with an average of 60 wipes per pack, that amounts to over 3000 wipes a year going into the bin, and ultimately into landfill sites. I had been feeling guilty about the number I was personally responsible for throwing away, and with another baby due, I was not prepared to double that number!
We all know...
...babies can be!
... how yucky...
I had never considered reusable wipes before, but the environmental benefits and money-saving benefits intrigued me. When Helen at Cheeky Wipes sent me an all-in-one kit to try and review, I was very keen to give it a go. 

The all-in-one kit
Kit contents, excluding boxes
First impressions...
My kit contained an instruction booklet, 25 white terry cloths, "mucky" and "fresh" essential oil blends, boxes for fresh and dirty wipes, bags for on-the-go use, and a mesh bag for putting in the washing machine. The whole kit looks really professional and sharp, even down to each terry cloth boasting a "Cheeky Wipes" label- and you know how big I am on branding!  

I was a little overwhelmed when I opened the box- having been used to just opening a pack of disposables and using one! However, once I took everything out and read the instructions, it was actually very easy. All you need to do is fill the "fresh" box with a couple of centimetres of water, add drops of the essential oil mix, then pop the cloth wipes in.  
My "fresh" wipes, ready for use!
The Cheeky Wipes label
Getting started... 
The clip on the "fresh" container means that the wipes stay moist and fresh for 3 days. When I need a baby wipe, I just open the box and take one out. They smell gorgeous, and in turn my baby's skin smells gorgeous! I have found that 25 wipes is about the ideal amount needed for 2-3 days, before I wash them. 

The larger box is for the cloths once they have been used. All you need to do is line it with the mesh bag, fill to the line with water and add the "mucky" essential oil blend. Once the cloth is dirty, I put it in the box until I am ready to put a load of washing in the machine. 
The two boxes: "fresh" and "mucky"
Out and about... 
I found that using these wipes while out and about was convenient and hassle-free too. The all-in-one kit includes two waterproof bags- one for a bundle of fresh wipes, and which keeps the dirty ones safe and separate in your changing bag until you get home. The bag for dirty cloths has a mesh lining, which is detachable when it comes to washing. The wipes were a real conversation-starter when out with other mums- they seemed impressed with how convenient they were to take out, use, and put away again. 
Holds about 15 wipes
With detachable mesh insert


Washing... 
The Cheeky Wipes are small, so don't take up much space in the washing machine. It is recommended that they are washed at 60 degrees, and with all my daughter's clothes, towels and bedding I tend to put a hot wash on every couple of days anyway. You don't need to wait for them to dry before putting them back in the "fresh" box and using again!
Unzip the mesh insert and pop it in the wash!
Can you even use them for...?
The wipes are suitable for cleaning up everything- including baby poop! It took me around a week to build up to using them for this purpose (yes, I was a little bit squeamish at the thought!) They did work very well at cleaning my baby's bottom (I must stress this fact!), and I put the cloth wipe into my "mucky" box without any problems. So far, so good. However, when it came to transferring the mesh bag from the box into my washing machine, the drips of water onto the floor were unavoidable. This does not normally bother me, but when the water had a "poopy" element to it, I was put off. Tipping the water out of the box to wash it wasn't the most pleasant task either on this occasion. 

Conclusion...
In conclusion, I am truly converted to Cheeky Wipes... for all uses, apart from dealing with dirty nappies! I decided that using a couple of disposable wipes a day- only if necessary, and only for dirty nappies- was a big improvement on using them all the time. My husband and I now use Cheeky Wipes for Heather's mucky face and hands, and for wet nappies. They do clean more thoroughly than disposables, smell nicer, cost less long-term and are much better for the environment. I would recommend switching to anyone (and have been doing so!) 
Cheeky Wipes put an end to this! 
There is actually a Cheeky Wipes kit especially designed for hands and faces, so when the time comes to replenish my kit, I have my eye on the pretty multicoloured wipes- you can buy all the elements separately. The all-in-one kit I have is currently on offer at £29.99 (normally £39.99) so I think most people with one child would see the financial benefits in a few months' time. People using the kits for more than one child, however, will benefit much quicker! 

Discount Code: Cheeky Wipes are offering £5 off orders over £40, using the discount code gmd123 at the checkout. Visit the website now! If you are thinking about making the switch, feel free to ask me any questions about my experience. 

Saturday, 29 March 2014

Thrifty ways to amuse a toddler on a flight

The thought of taking a toddler on a flight would fill any parent with dread. Before I had my daughter, I was that person on a plane... I would sit, arms folded, frowning at parents of unruly children, whispering "why can't they do something?!" However, times have changed, and in 2 weeks I will be on the other side of the equation, doing everything I can to keep my unruly little one amused. Infants under 2 are generally not given their own seat, and instead are expected to sit on their parents' knees for hours on end. And we all know how easy that is!  

It's difficult to know what to bring to entertain a child on a journey, so the temptation is to spend wildly, buying everything... well, they might like it! This plan of action, however, will result in super-heavy hand luggage, rummaging through a bulging bag and having more to carry all round. 

Here are my top (inexpensive!) suggestions: 
  • Small books. Little books won't take up much room, or weigh much, and you can take quite a few in your luggage. I love these ones, which my husband found in TK Maxx for £4... only 44p a book! Nine tiny books take up the same room as one bigger book, and will extend the fun for much longer. 
Only £4 for 9 books from TK Maxx!
  • Unfamiliar toys. These do not need to be all new toys, as this will add expense. Why not dig around at the bottom of their toy box for things that haven't played with in months, and have probably forgotten about? Go for lots of small items over just a couple of big ones- variety is key. Consider keeping aside one or two presents from your child's birthday or Christmas, to reveal on the journey. I love this fun toy plane- it's small, not expensive, and has lots of activities in one. Wrapping the toys up and giving them to your child as gifts every once in a while will extend the novelty further. 
  • "Non-toy" items. Toddlers love playing with anything which isn't technically a toy (they love the remote control, but the kids' versions just don't cut it!) As long as the item is safe, let them fiddle with it for a while- even if it involves ripping up the in-flight magazine, chewing the menu, playing with headphones or even rustling a sick bag. It will pass valuable time!
A definite toddler-magnet!
  • Bring snacks. Eating does help to break up the journey, so pack plenty of snacks to keep your toddler occupied throughout. Think carefully about the snacks you choose, and steer clear of messy things like yoghurt. Sugary snacks may keep them occupied, but beware of the sugar high (and subsequent slump!) thereafter. Oat bars and fruit crisps which release energy more slowly are better choices. 
  • Tablet/ Smartphone- OK, so this one isn't a cheap option. However, if you already have a tablet or a smartphone, there's no denying that it is an incredibly effective way to keep little ones amused for periods of time. Lots of apps designed for babies and toddlers are free to download, and Fisher Price's free games are really cute. If all else fails, turn to BBC's iPlayer app to download some of their favourite programmes in advance. 
My little one loves the Giggle Gang! 
Please feel free to share and suggest any of your fail-safe tricks and tips for a stress-free journey with little ones in the comments space below! 

Saturday, 22 March 2014

My Peacock Creations for Hillary's Blinds Competition

My peacock creations
A few weeks ago, Hillary's Blinds launched a Country Crafts creative competition (I saw it on Craft Blog UK...to find out more, click here.) The contest page opens with a challenge: "Are you a superstar craft blogger capable of transforming a humble piece of fabric into an eye-catching wonder?"

Well, that's a lot to aspire to! I know I'm not the most technically gifted crafter, but what I lack in that department I make up for with enthusiasm. I do love a craft challenge, and the choice of fabrics on offer were too beautiful to turn down. I absolutely adore peacocks- the colours, their majestic symbolism and their natural beauty, so I chose Bird Parade Teal. 
Fabricswatches -hub -FINAL
Entrants were sent 1m x 1m of their choice of fabric
My inspiration at the moment largely comes from my daughter- I love nothing more than making things for her, and for my home. With her dark curls and complexion, I think she really suits rich, jewel colours like teal and purple. I decided that instead of making one single item from my metre squared fabric, I would make a miniature peacock-themed outfit for Heather. 
Heather working her peacock ensemble!
Giving us a better view
Skirt
I followed my own tutorial on making a baby skirt from a fat quarter of fabric. (Find the full instructions here if you fancy making your own!) The most difficult part about making this skirt perfect was aligning the fabric so the prettiest parts of the fabric were visable. I love how it looks as though the peacock and blossoms have been painted on to the fabric in watercolour.
Made from a fat quarter (18" x 22")
 Beaded and appliquéd peacock vest 
I wanted to showcase the peacock's beauty, and make it the star of the show, using appliqué. Appliqué is not a craft which comes naturally to me... it is one I have tried and failed before! Due to the nature of the upholstery fabric, this tended to fray round the edges, making the job more difficult. However, after lots of research online, I tried a new technique.
My peacock, ready for appliqué!
I took a piece of thin card and cut it to the same size as my peacock. I then cut around 5mm off the whole way round, so the fabric was a little bigger. Next, I laid the card on the back of the fabric. Using an iron, I folded and pressed the edges of the fabric round the card. You can see how this leaves you with crisper, neater folds- making it much easier when it comes to sew the appliqué on. 
View from the back during ironing
Cut the card slightly smaller than the fabric
I pinned the peacock in place on a plain vest, then stitched it down. If you're trying this, make sure you tuck all the rough edges well underneath before you stitch it down, otherwise it will fray. I also ironed the peacock appliqué flat against the vest at this point.

The peacock was in two parts, due to the way I cut the fabric to make the skirt. To disguise the join, I gave its tail some extra glamour and sparkle by adding beads. I personalised the vest further by creating a flower to sew to the shoulder. I did this in the same way as my "scrap-busting flower brooch"- you can find the tutorial for this here
Extra tail bling!
Flower detail on the shoulder
Side view
The finished vest
Headband 
A beautiful vest and skirt deserve to be paired with an equally beautiful hair accessory! I created this headband in a similar way to the flower decoration on the shoulder of the vest, finishing it with a broken vintage bird brooch. I measured Heather's head, and cut a piece of elastic 1" smaller, to make the headband. 
Headband
Close-up of the vintage brooch detail
Owl Cushion
After having created Heather's peacock ensemble, I had a little fabric left over. I had thoroughly enjoyed working with the beautiful fabric, so decided to complete my series of bird-themed creations with an owl cushion. As you can see, Heather is enjoying sharing a book and a game with him. 
Sharing a book in the study
Snuggling up on the sofa
Taking part in this competition was so much fun, and the fabric was gorgeous! I already can't wait until next year, to participate again. 

Please follow Make Thrift Love Life on Bloglovin' for more thrifty, crafty, frugal lifestyle posts!