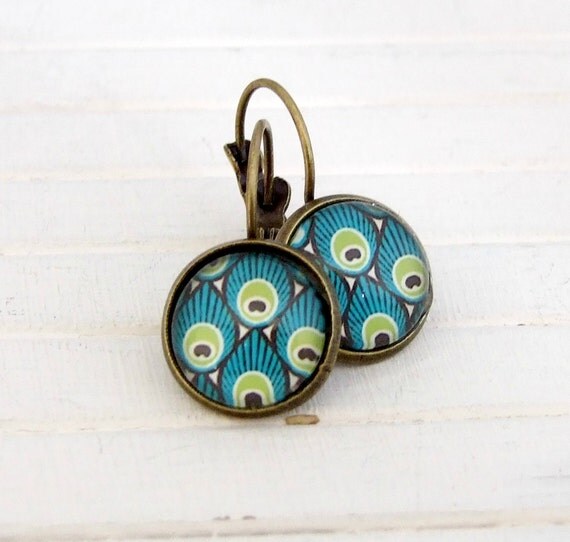
Monday 31 March 2014

DIY hand-painted cherry blossom bowl

Painted by my own fair hand!
My love for cherry blossoms is no secret, and I'm always on the lookout to introduce more Japanese sakura gorgeousness into my home. I must confess to being guilty of leaving my earrings lying around on my bed stand when I take them off at night, so I decided to decorate a trinket bowl to keep them safe- and to look pretty, of course.

I found this nicely shaped, albeit a little boring, temple bowl in my local B&M Home Store, for just £1.99.  Perfect for a quick and thrifty makeover... 
Cheap and cheerful plain bowl
I dug out my mini acrylic paint set (the same one I used for my Daruma doll canvas), and set about making my bowl into a cherry-blossom-covered beauty. First, I painted the bare branches, then I added the little pink blossoms. 


Bare branches
A little colour on the branches...
I waited for the paint to dry completely before adding the finishing touches- tiny brown crosses in the centre of the blossoms. At this stage, I could also touch up little bits on the branches that I wasn't entirely satisfied with. Finally, I took a purple Sharpie and branded my bowl with "handpainted by Pink Robot" on the bottom. Not that I plan to sell this bowl... but I think it does finish my project off nicely. 
With the little crosses on the blossoms
My branded bowl


Here is the finished bowl, looking much much more beautiful! I love the fact that it is one-of-a-kind, and you can't beat the satisfaction of seeing something you have worked on yourself brighten up your home. 
Ta-dah! 
Shared at these fabulous link parties... 

Saturday 29 March 2014

Thrifty ways to amuse a toddler on a flight

The thought of taking a toddler on a flight would fill any parent with dread. Before I had my daughter, I was that person on a plane... I would sit, arms folded, frowning at parents of unruly children, whispering "why can't they do something?!" However, times have changed, and in 2 weeks I will be on the other side of the equation, doing everything I can to keep my unruly little one amused. Infants under 2 are generally not given their own seat, and instead are expected to sit on their parents' knees for hours on end. And we all know how easy that is!  

It's difficult to know what to bring to entertain a child on a journey, so the temptation is to spend wildly, buying everything... well, they might like it! This plan of action, however, will result in super-heavy hand luggage, rummaging through a bulging bag and having more to carry all round. 

Here are my top (inexpensive!) suggestions: 
  • Small books. Little books won't take up much room, or weigh much, and you can take quite a few in your luggage. I love these ones, which my husband found in TK Maxx for £4... only 44p a book! Nine tiny books take up the same room as one bigger book, and will extend the fun for much longer. 
Only £4 for 9 books from TK Maxx!
  • Unfamiliar toys. These do not need to be all new toys, as this will add expense. Why not dig around at the bottom of their toy box for things that haven't played with in months, and have probably forgotten about? Go for lots of small items over just a couple of big ones- variety is key. Consider keeping aside one or two presents from your child's birthday or Christmas, to reveal on the journey. I love this fun toy plane- it's small, not expensive, and has lots of activities in one. Wrapping the toys up and giving them to your child as gifts every once in a while will extend the novelty further. 
  • "Non-toy" items. Toddlers love playing with anything which isn't technically a toy (they love the remote control, but the kids' versions just don't cut it!) As long as the item is safe, let them fiddle with it for a while- even if it involves ripping up the in-flight magazine, chewing the menu, playing with headphones or even rustling a sick bag. It will pass valuable time!
A definite toddler-magnet!
  • Bring snacks. Eating does help to break up the journey, so pack plenty of snacks to keep your toddler occupied throughout. Think carefully about the snacks you choose, and steer clear of messy things like yoghurt. Sugary snacks may keep them occupied, but beware of the sugar high (and subsequent slump!) thereafter. Oat bars and fruit crisps which release energy more slowly are better choices. 
  • Tablet/ Smartphone- OK, so this one isn't a cheap option. However, if you already have a tablet or a smartphone, there's no denying that it is an incredibly effective way to keep little ones amused for periods of time. Lots of apps designed for babies and toddlers are free to download, and Fisher Price's free games are really cute. If all else fails, turn to BBC's iPlayer app to download some of their favourite programmes in advance. 
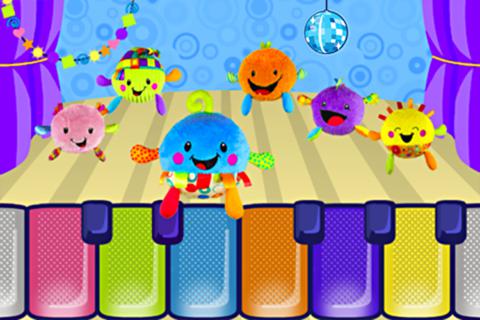
My little one loves the Giggle Gang! 
Please feel free to share and suggest any of your fail-safe tricks and tips for a stress-free journey with little ones in the comments space below! 

Friday 28 March 2014

Easy Origami Mother's Day Cards

It's Mother's Day this Sunday! Left buying your card until the last minute? Funds don't stretch far enough to buy a shop-bought card? Simply prefer the sentiment of making your own?  I have the perfect craft for you... origami!

Card shops can charge up to £5 for a beautiful hand-crafted card, and I would rather spend the extra £5 on my mum's present, and make her a card for free (or next to nothing!) 
Origami hearts from maps, book pages and wrapping paper
Many of you thrifty people will save used wrapping paper "just in case", and have a stash of it lying somewhere. Use your imagination here- this works with almost any kind of scrap paper, and you only need a small amount. I used old book pages, maps torn from the back of an old work diary, and wrapping paper. 

There are hundreds of websites dedicated to origami instructions, but if you're a beginner, I'd suggest searching Google for "Origami for kids" to get started. One of the easiest and most addictive origami shapes I've found are these sweet little hearts... perfect for a Mother's Day card. You can find the instructions here.  
Re-used pink floral spotty wrapping paper
For a book-loving mum
Using pages from an old map would be a great idea if you were making a card for a far-away loved one. You could carefully choose their location, and your location, for the hearts! 
Map hearts
Of course, there are plenty of other origami shapes you can try! Origami is very therapeutic, and once you have the hang of it you can fold away in front of your favourite TV programme- productivity while relaxing! Recent studies (like this one) have shown that crafting (especially crafts which require both hands) are beneficial to mental health, and I would quite agree that craft keeps me sane, even after sleepless toddler-teething nights. 
8-point star
What are you waiting for? Grab some scrap paper from your stash and get folding! Here is a slightly more complicated 8-point star I tried earlier, and a friendly swan for good measure. Good luck! 
Decorative swan

Thursday 27 March 2014

Preparing for a craft fair part 4: custom labels

I wrote about the importance of building your brand in part 3 of this series, and today I will explore further another inexpensive way of personalising your items: using custom labels. 

I think offering a fairly diverse range of items at your first craft fair, while keeping the overall "feel" and "style" of your products the same, is the best strategy. This way, you can test what sells best for future and bigger events. I plan to expand Pink Robot's range to include lined baby skirts in fabulous, unusual fabrics- like these two Japanese cotton designs. 
Origami crane and blossoms
Japanese fans
Crafted Home, a Glasgow-based Etsy shop, sent me some personalised fabric labels to try out. The skinny labels (12.5mm) in particular tie in perfectly with Pink Robot's handmade vibe, and the textured white cotton tape feels thick and expensive. At £5 for 30 labels, though, they are most definitely affordable.. only around 17p a label!
A little selection of Crafted Home labels
I put these labels to the test when I made a reversible skirt from my Japanese fabrics. The labels are pretty versatile, and can be sewn on in lots of different ways, depending on the item you are personalising. I hand-sewed mine on, making the label a visable feature, but on something like a dress or purse, I would machine sew it flat. 

The fabric label was super easy to sew on, and there was plenty of room at either side of the text for stitching. 
I made the label a feature of the skirt
Giving my skirt a more professional, designer feel
Easy to sew!


I also make baby tutus from soft and fluffy tulle. I decided to add branding to two I made for Heather a while ago, and experiment with the placement of the labels for this review. As a tutu has nowhere "out-of-sight" to place a label, I embraced it as part of the bespoke design. It looks great, and my plan is for people to see the brand name when Heather wears them... a mini walking advert! With that in mind, I sewed a label on to the vest from my peacock collection, to experiment further with position. I placed this one right at the bottom, and it gives the vest a unique look. 
The stitching is hidden in the tulle
Pink Robot branded ballet tutu!
Vest label
I was hugely impressed with Crafted Home's personalised labels, and once I have made all my lined baby skirts to add to Pink Robot's collection, I will definitely be placing an order! For such little expense, I think adding finishing touches like this could add to the value of your items. 

To keep up to date with the rest of this series, and for other thrifty, creative tips, follow Make Thrift Love Life on Bloglovin': http://www.bloglovin.com/blog/11924471

Monday 24 March 2014

Gorgeous Etsy jewellery- Beadish Delight earrings

Etsy has such a wealth of gorgeous jewellery on offer, completely different to items available on the high street. The fact that you can own a one-of-a-kind piece for a very affordable price completely appeals to me and my thrifty lifestyle. When the lovely Karen at Beadish Delight sent me this beautiful pair of peacock feather earrings, I fell in love with them- so I was more than happy to review them for my blog!
Peacock Feather Earrings .. peacock earrings, 12 mm, kitsch, jewellery, peacock feather, aqua earrings, art deco
Peacock feather earrings by Beadish Delight
The earrings arrived in a sweet little black box, tied with ribbon and a branded tag. The elegant business card made the whole package seem professional. I have previously written about how important taking the extra time to package and brand your products is (read my post here), and this was an example of how it pays off. 
Beautifully packaged
The earrings were nestled safely inside the box in padding and tissue paper. This added to the luxury feel of the product, while keeping them safe in the post. 
Cute little box
One of the most striking and unusual features of the earrings is the lever closure hook at the back. They are well-made and feel sturdy. The lever makes the earrings sit in the perfect position once in the ear, and it makes fastening them super easy- as well as adding to the unique design! 
The lever closure system
Since their arrival a few days ago, I have worn these earrings a lot- the teal and lime green colours go with much of my wardrobe. In these photos, I paired them with a fabulous vintage silk scarf, which I bought from a local thrift shop called Glad Rags. I find that they really cheer up a plain dress, and each time I have worn them, people have commented and admired them.  
The earrings with my thrifted silk scarf
You can buy these earrings here in Beadish Delight's Etsy shop for only £8. I think they would make a fabulous gift, and since they arrive so well presented, could even be sent straight to the recipient's home! Her range also includes lots of other wonderfully unique pieces of jewellery for great prices, such as necklaces, brooches, hair accessories and rings. I would absolutely recommend buying from here. 

Please follow Make Thrift Love Life on Bloglovin' for more thrifty, crafty, frugal lifestyle posts! 

Saturday 22 March 2014

My Peacock Creations for Hillary's Blinds Competition

My peacock creations
A few weeks ago, Hillary's Blinds launched a Country Crafts creative competition (I saw it on Craft Blog UK...to find out more, click here.) The contest page opens with a challenge: "Are you a superstar craft blogger capable of transforming a humble piece of fabric into an eye-catching wonder?"

Well, that's a lot to aspire to! I know I'm not the most technically gifted crafter, but what I lack in that department I make up for with enthusiasm. I do love a craft challenge, and the choice of fabrics on offer were too beautiful to turn down. I absolutely adore peacocks- the colours, their majestic symbolism and their natural beauty, so I chose Bird Parade Teal. 
Fabricswatches -hub -FINAL
Entrants were sent 1m x 1m of their choice of fabric
My inspiration at the moment largely comes from my daughter- I love nothing more than making things for her, and for my home. With her dark curls and complexion, I think she really suits rich, jewel colours like teal and purple. I decided that instead of making one single item from my metre squared fabric, I would make a miniature peacock-themed outfit for Heather. 
Heather working her peacock ensemble!
Giving us a better view
Skirt
I followed my own tutorial on making a baby skirt from a fat quarter of fabric. (Find the full instructions here if you fancy making your own!) The most difficult part about making this skirt perfect was aligning the fabric so the prettiest parts of the fabric were visable. I love how it looks as though the peacock and blossoms have been painted on to the fabric in watercolour.
Made from a fat quarter (18" x 22")
 Beaded and appliquéd peacock vest 
I wanted to showcase the peacock's beauty, and make it the star of the show, using appliqué. Appliqué is not a craft which comes naturally to me... it is one I have tried and failed before! Due to the nature of the upholstery fabric, this tended to fray round the edges, making the job more difficult. However, after lots of research online, I tried a new technique.
My peacock, ready for appliqué!
I took a piece of thin card and cut it to the same size as my peacock. I then cut around 5mm off the whole way round, so the fabric was a little bigger. Next, I laid the card on the back of the fabric. Using an iron, I folded and pressed the edges of the fabric round the card. You can see how this leaves you with crisper, neater folds- making it much easier when it comes to sew the appliqué on. 
View from the back during ironing
Cut the card slightly smaller than the fabric
I pinned the peacock in place on a plain vest, then stitched it down. If you're trying this, make sure you tuck all the rough edges well underneath before you stitch it down, otherwise it will fray. I also ironed the peacock appliqué flat against the vest at this point.

The peacock was in two parts, due to the way I cut the fabric to make the skirt. To disguise the join, I gave its tail some extra glamour and sparkle by adding beads. I personalised the vest further by creating a flower to sew to the shoulder. I did this in the same way as my "scrap-busting flower brooch"- you can find the tutorial for this here
Extra tail bling!
Flower detail on the shoulder
Side view
The finished vest
Headband 
A beautiful vest and skirt deserve to be paired with an equally beautiful hair accessory! I created this headband in a similar way to the flower decoration on the shoulder of the vest, finishing it with a broken vintage bird brooch. I measured Heather's head, and cut a piece of elastic 1" smaller, to make the headband. 
Headband
Close-up of the vintage brooch detail
Owl Cushion
After having created Heather's peacock ensemble, I had a little fabric left over. I had thoroughly enjoyed working with the beautiful fabric, so decided to complete my series of bird-themed creations with an owl cushion. As you can see, Heather is enjoying sharing a book and a game with him. 
Sharing a book in the study
Snuggling up on the sofa
Taking part in this competition was so much fun, and the fabric was gorgeous! I already can't wait until next year, to participate again. 

Please follow Make Thrift Love Life on Bloglovin' for more thrifty, crafty, frugal lifestyle posts! 

Thursday 20 March 2014

Writing for Scottish Fashion- Online Magazine

I'm delighted to announce that I am now a contributor for Scottish Fashion- a new online magazine reporting on Scottish Fashion news. 

In keeping with my blog philosophy, I will be writing about Scottish fashion on a smaller budget- including a monthly spotlight about up-and-coming Scottish designers, seeking out undiscovered crafting talent, and highlighting the best from independent shops. I'll also be exploring what I think Scotland's fashion scene does really well- its wealth of vintage and second-hand clothes shops. 

My debut article for the magazine went live this evening, which is very exciting. My article introduces a small, independent designer, Mercurio Millinery, and her beautiful range of clutch bags. I chose this particular designer because I was drawn to the range of fabrics she uses, and the affordable luxury of her brand. 
My favourite bag from her range- isn't it stunning? 
You can read the full article here, and stay tuned for more pieces on what I love about Scottish fashion!

Scrap buster- quick DIY fabric brooch

If you are anything like me, sometimes you just need a quick craft fix. To be able to whip up a pretty item in record time, and feel smug about having created something. I have the perfect craft, which you can do in 20 minutes with a cup of tea- fabric brooches! The bonus is, you get to use up your fabric scraps at the same time. 
A perfect way to spend your morning tea break!
All you need are a rectangular fabric scrap, a tiny scrap of felt, a needle and thread, scissors, a brooch pin and a button/ bead for the centre. 
Vintage teacup fabric scrap
Step 1: Take your fabric scrap and fold it in half lengthways, with the raw edges to the bottom. They won't be visable when your brooch is finished. 
Step 2: Do a loose running stitch to join the two raw edges together. You will notice that the fabric begins to "gather up" as you go. Do this the whole way along the scrap, gathering it up as tightly as you can. 
Running stitch
Beginning to gather up
Step 3: When you get to the end of the fabric scrap, join the two ends together to make a circular shape (see below.) Fold in any rough edges and stitch to secure in place. 
Join the ends together, hiding rough edges
Step 4: Take a smaller rectangle, and repeat steps 1-3 with it. 
Making a smaller version
Little and large "flower" shapes
Step 5: Place the small flower shape on top of the large one and sew them together.
Sew right through the middle
Step 6: To give the brooch a more "polished" look, add a button or a bead to the centre. This will cover any raw edges and stitches which are visable from the front. I always keep a stash of spare buttons and beads for this type of craft- I tend to find the most unusual ones in charity shops. 
Gorgeous tortoiseshell- style leather button
Step 7: Make the back look pretty! As you can see, the back of the brooch has a lot of rough edges. All you need is a little circle of scrap felt, stitched on neatly, to cover this. Add the brooch pin to the felt, and voila! You have your quick, easy, fabric-stash-busting brooch!
Before
After, with felt and brooch pin added
Step 8: Show off your new brooch with pride!

Dress up your coat lapel
My brooch cheers up my trench coat
Please follow my blog on Bloglovin':